Monday, December 13, 2010

CARROT CAKE MUFFINS


CARROT CAKE MUFFINS – FINALLY A RECIPE WORTH SHARING!

I have been reading, testing, and rejecting recipes for a Carrot Muffin for the longest time. Many of the recipes I found were loaded with Agave nectar, which, by the way, is still sugar! If the recipe didn’t contain grains or sugar, it was dry or (worse yet) complicated to prepare. I had a snow day last week, and took matters into my own hands. I am happy with this recipe for two reasons. It tastes really good, and it can be prepared very quickly in a food processor.

Let me know how you like it.

Enjoy.


INGREDIENTS AND PREPARATION:

2 cups almond flour

½ teaspoon kosher or sea salt

2 teaspoons aluminum free baking powder

1 tablespoon Cinnamon

1/2 to 3/4 teaspoon powdered concentrate Stevia, such as KAL Brand or NOW brand.

¼ to ½ teaspoon freshly grated nutmeg

1 scant pinch of cloves

PUT ALL THESE DRY INGREDIENTS INTO A FOOD PROCESSOR. PROCESS TO COMBINE.

THEN ADD:

½ cup melted organic butter

1 tablespoon vanilla (no sugar – check the label)

½ cup unsweetened Vanilla Almond Milk (you can use water or organic whole milk)

4 extra large or 5 large organic free range eggs

PROCESS TO COMBINE INTO A SLIGHTLY WET BATTER.

POUR THE BATTER INTO A BOWL OVER:

1 ½ cups grated organic carrots

½ cup chopped raw pecans or walnuts.

STIR TO MIX.

DIVIDE INTO 12 MUFFIN CUPS LINED WITH PAPER OR SILICONE LINERS.

BAKE AT 350 DEGREES FOR 25 TO 30 MINUTES.

Thursday, December 9, 2010

Icelandic Christmas recipes

Since the holiday season in upon us I decided to gather together all the Christmas recipes I have published on this blog. I chose to do it this way rather than repost them because the comments get lost when reposting. I plan to make this an annual post, with new recipes added as they come along, so if you have comments, please comment on the recipes themselves, unless you don't mind if your comments go missing every time I repost this list.

So here they are, starting with the Christmas dinner dishes:

Starters or desserts:

Main dishes:

Side dishes and accompaniments:

Cakes and cookies:

Wednesday, November 24, 2010

Rjómaterta III: Púðursykurmarengs - Cream cake III: Brown sugar meringue

This is a simple and impressive fancy cake – if you can avoid breaking the meringue!
If it does break, no matter: simply crush the meringue and layer it in dessert bowls or glasses with the cream, or toss it with whipped cream, fresh fruit and chocolate bits to make a smashed Pavlova.


4 egg whites
400 ml brown sugar

Optional:
1 cup cornflakes and ½ tsp baking powder

For the filling:
Whipping cream
Chocolate bits, chocolate-covered raisins, salted peanuts (all optional)

Whip together the sugar and egg whites (and baking powder if using cornflakes) until sugar is melted and mixture is stiff. If using, fold in cornflakes. Smooth into two greased round baking tins, or put into an icing bag and squeeze onto a cookie sheet covered with baking paper in a circular shape (good idea to make a guide on the paper beforehand with a pencil and a plate). Bake at 150°C for 1 hour. Cool.

To make a simple but tempting cream cake, put whipped cream between the layers a day before serving and refrigerate overnight. Chopped chocolate, chocolate-covered raisins and/or salted peanuts area a good addition to the whipped cream.

Wednesday, November 17, 2010

Cold bread casserole

Have I mentioned the Icelandic taste for bread dishes? Here is one more:

This casserole, decorated with cucumber and red bell pepper.
Sweet mustard
White (French) bread

4 hard-boiled eggs
1 small can crushed pineapple, minus the juice
15-18 slices of ham, julienned or cut into small squares
1 small Camembert cheese, cut into small cubes
1/2 cup mayonnaise
1/2 cup sour cream
1 leek, pale part only, finely chopped (you can also use chives or spring onions)
1 tsp Season-All (or to taste)

Garnish, to be prepared shortly before serving:
Red bell pepper, finely chopped
Green bell pepper, finely chopped
Arctic shrimp, cooked

Smear a thin layer of mustard inside the casserole dish. Remove the crusts from the bread, tear the bread into small pieces and line the casserole dish with it. Mix together the remaining ingredients, except the bell peppers and shrimp. Refrigerate overnight.

Garnish just before serving, or if you garnish right away, make sure the shrimp and bell peppers don’t touch because the shrimp will absorb colour from the peppers. The toppings can be used to make patterns on top of the dish, if desired.

Wednesday, November 10, 2010

Rjómaterta II: Guðdómlegt Gums - Cream cake II

Once upon a time I promised to publish more recipes for fancy cream cakes, and here is one that’s a favourite with both young and old. The name, Guðdómlegt gums means Heavenly Mess.

4 egg whites
200 g sugar

Whip together until the sugar is mostly melted.

1/2 cup salted peanuts
1/2 cup chopped dates
100 g dark chocolate chips
1/2 tsp baking powder

Fold carefully into the egg-sugar mixture. Bake in 2 round baking tins with detachable bottoms, at 150°C for 1 hour. Cool.

Whip 1/2 litre of cream until stiff. Fold in some quartered strawberries, 1 mashed banana, a handful of salted peanuts and a handful of chocolate-covered raisins. Put between the 2 layers. Decorate with whipped cream, strawberries, salted peanuts and chocolate-covered raisins.

The other recipe

Wednesday, November 3, 2010

Flatbread III: Potato bread - Kartöfluflatbrauð

Here is a third flatbread recipe.

500 g potatoes, cooked, peeled and cooled
250 g rye flour (or more, if needed)

The amount of rye flour depends on how much moisture there is in the potatoes. Start with the given amount and add more if necessary. Mash the potatoes until smooth, or process in a food processor (take care not to over-process, or they may turn gummy). Knead the rye flour into the potatoes until you have a stiff, dense dough. Whole wheat flour may be mixed in with the rye flour. Roll out the dough into thin, round cakes. Dry-fry the cakes on a griddle or electric hotplate until browned with small burnt-looking spots.

Links to the other recipes:
Most commonly used recipe
Luxury recipe

Wednesday, October 27, 2010

Party casserole

I mentioned this dish in my post about the bread casserole, but was unable to find the recipe at the time. Well, here it is:

White (French) bread in slices, enough to cover the bottom of the casserole dish
400 g mayonnaise
1 tub sour cream (about 180 g, but a little more or less will not hurt the dish)
1 can Campbell’s condensed mushroom soup
1 small can asparagus
Grated cheese, e.g. Mozzarella or a mixture of Mozzarella and Gouda
1 1/2 small can mushrooms (I recommend using lightly sautéed fresh mushrooms instead)
10 slices of ham, cut into squares (for a vegetarian version leave out and just use more mushrooms)


Remove the crusts from the bread and cut into cubes. Cover the bottom of a greased casserole dish with the bread cubes. Mix together mayonnaise, sour cream and the soup. Add the asparagus. Pour the mixture over the bread and top with mushrooms and ham and sprinkle the cheese over the top.

Bake at 200°C for about 20 minutes, or until the cheese is bubbly and golden.

Wednesday, October 20, 2010

Shepherd's pie

I have used the English name for this dish, but the dish itself is a logical invention that could have happened any place where potatoes and mutton are eaten. I occasionally make it to use up leftover Sunday roast.

250 g leftover meat (for this to be a real shepherd’s pie, it should be mutton. If it’s beef, the dish is called Cottage Pie)
25 g butter, margarine or other cooking fat
2 tbs flour
250-300 ml meat broth or gravy
Some left-over mashed potatoes

In case you don’t have left-over mashed potatoes:
750 g cooked potatoes
100-200 ml milk
25 g butter or margarine
Salt and pepper
1 finely chopped onion
Breadcrumbs
Cheese, grated

Make the mashed potatoes, using this method but the above ingredients. Add the onion when the mash is ready to eat. It is also good to add one beaten egg or two beaten egg whites into the mash (I never do this, but it probably makes a better crust).

The meat can be either boiled or roasted, but this does not suit smoked meats.
Grease an oven proof dish and sprinkle in some breadcrumbs. Slice the meat and arrange in the bottom of the dish. Pour the gravy on top. Top with the mashed potatoes and sprinkle with some grated cheese and breadcrumbs.

Bake at about 175°C for 20-30 minutes, or until hot through.

If there is no gravy or sauce, make some gravy with a little broth thickened with a paste of flour and water and a little bit of sauce browning added.

Wednesday, October 13, 2010

Potato Danish pastries

150 g butter or margarine, at room temperature
150 g flour
150 g cooked potatoes
Rhubarb jam
Some almonds, flaked
Pearl sugar

Peel and mash the potatoes until completely smooth. Knead together with the butter and flour. Roll out to a thickness of about 3 mm. Cut into strips of about 15 cm wide. Spread rhubarb jam down the center of each strip, fold in the edges so that about 2 cm strip of jam is showing between them. Brush with milk and sprinkle with flaked almonds and pearl sugar.

Wednesday, October 6, 2010

Chunky fish spread:

This is a recipe developed my myself and my mother. Serves 4 as a starter or 2 as a main dish.


1/2 fillet of cold cooked fish, e.g. cod or haddock (but salmon and trout work as well), cut into small pieces

3-4 cold cooked potatoes, cut into small pieces

1/2 onion or red onion, finely chopped

Mayonnaise to taste

Pepper
Garlic powder


Mix together the mayonnaise and spices and add the rest, blending well. Serve on sweet, dark rye bread.


Note: I also like to add 1/2 a finely chopped red bell pepper to this spread.

Wednesday, September 29, 2010

Leftover fish salad

150 gr cold cooked fish, preferably salmon or halibut, cut into small pieces
Mayonnaise to taste
6 leaves of green salad
3 tomatoes
6 slices of lemon
Lemon juice
Mustard

Add lemon juice and mustard to the mayonnaise, to taste. Wash the salad leaves and let them drain well, divide the fish pieces evenly onto the leaves and top with mayonnaise, 1/2 a tomato and a slice of lemon.

From 160 fiskréttir by Helga Sigurðardóttir

This is the last recipe from this book (for now, but I may return to it later).

Wednesday, September 22, 2010

Using up leftover fish: frying

I have already posted two recipes for using leftover fish: fish pancakes and the humble plokkfiskur, which is currently enjoying something of a renaissance. Here is one more leftover fish recipe, and two more will be posted soon.

You will need:
Enough cooked leftover fish and potatoes to serve four people, cut into bite-sized pieces
Cooked vegetables, if desired
100 g butter or tallow
Salt and pepper
Chives or onions, chopped

Heat the butter in a frying pan until it stops foaming. Gently fry the fish and potatoes and onions (if using) in the butter until heated through and slightly browned. Do not scramble the food around in the pan much – the fish pieces should be intact when served. Flavour with salt and pepper to taste, and if you’re using chives, sprinkle them over the dish before serving.

From 160 fiskréttir by Helga Sigurðardóttir

Wednesday, September 15, 2010

Fried smoked trout with scrambled eggs

There are two wild species of trout found in Iceland: the brown trout (Salmo trutta) and the arctic char (Salvelinus alpinus). Additionally, rainbow trout (Oncorhynchus mykiss) have been released into some lakes and rivers. The collective name in Icelandic is silungur, the char being called bleikja and the brown trout urriði.

This is a nice brunch dish that can also be made with smoked herring.

1 large, whole smoked trout
Butter
6 eggs
Salt
6 tbs milk
Butter

De-bone and skin the trout and cut it into slices. Melt the butter in a frying pan and fry the fish in it.

Scrambled eggs:
Mix together the eggs, salt and milk until well blended. Pour into a saucepan and cook over medium heat, stirring gently in circles until the mixture begins to thicken, then scramble the mixture back and forth until it is of the desired consistency.
Arrange on a serving platter with the fried trout and serve.

From 160 fiskréttir by Helga Sigurðardóttir

Wednesday, September 8, 2010

HOME‐MADE GREEN APPLE APPLESAUCE


Apple Season is here! I made a double batch of this recipe for some children who were visiting our cottage on Labour Day weekend, and I was reminded that, when it comes to delicious, we are all children. The adults gobbled it up!
The first time you taste this, you will understand why it is worth making your own home‐made applesauce.
Enjoy.

Ingredients:
3 lbs Granny Smith apples
1 teaspoon cinnamon
1 pinch nutmeg (freshly grated is wonderful if you have it)
1 1/2 cups water
2 thin lemon slices
1/4 teaspoon salt
1 to 2 tablespoons “Spoonable” brand stevia, or
equivalent (optional, and to taste)

Preparation:
1) Peel and core apples
2) Cut apples into approximately 1 inch cubes.
3) Add all ingredients to a pot, and turn heat on high. Bring to a boil, then cover and reduce heat to low.
4) Simmer for 20 minutes or until the apples have softened significantly.
5) Stir frequently, making sure that the apples are not sticking to the bottom of the pot. Add more water if necessary. Remove lemon slices.
6) Mash with a potato masher or use a food mill for a smoother consistency.
7) Taste the applesauce. If it is too tart and you want to add some sweetness, now would be the time to add a tablespoon or two of “Spoonable” brand stevia to taste.
8) Serve warm, at room temperature, or chilled, if it lasts that long.

Halibut in cream sauce

Halibut has a number of names in Icelandic, reflecting its importance as a food fish. They include flyðra, spraka, lúða and heilagfiski. The last name means “holy fish”, presumably because it was popular Fridays food during the Catholic era.

Halibut grow to a gigantic size: the current record is around 330 kilos. One was recently caught off the coast of the West Fjords that weighed in at 219 kg. and was 248 cm. long. The flesh of these giants is rather coarse, but the flavor is delicious.

750 g halibut
1 tbs flour
Salt and pepper
2-3 onions
100 g margarine
100 g butter
50 ml cream

Fillet and skin the halibut. Cut into 2 cm thick slices.
Mix together flour, salt and pepper.
Slice the onions into rings.

Brown the margarine in a frying pan and fry the onions in it until golden. Remove and set aside. Put the butter in the pan, keeping back a small amount, and brown the butter in the pan. Dredge the fish slices in the flour mixture and brown over high heat for about 10 minutes. Arrange the fish pieces on a serving platter and top with the browned onions.

Deglace the pan with a little water, adding the cream and remaining butter. Strain into a sauce bowl.

Arrange poached potatoes on the platter on one side of the fish, and serve.

From 160 fiskréttir by Helga Sigurðardóttir

Wednesday, September 1, 2010

Fried cod cheeks

10 cod cheeks
1 egg white, beaten until it begins to froth slightly
Bread crumbs with salt and pepper to taste
200 g butter or margarine

Cut the cheeks away from the heads if needed. Clean well (scrape off the slime under cold running water) and pat dry. Dip the cheeks in the egg white and dredge in the breadcrumbs. Fry in the butter until golden brown. Sprinkle salt and pepper over them and serve with hot, poached potatoes.
May also be cooked in the oven.

From 160 fiskréttir by Helga Sigurðardóttir

Tuesday, August 31, 2010

Asian Halibut Fish Cakes

This recipe is adapted from a salmon cake done by Martha's people at Everyday Food. I switched out the salmon for wild halibut and I knew it would be a new family favorite. The lovely mild ginger flavor makes this dish fragrant and delicious. I also learned a neat trick for making fish cakes without benefit of flour or corn meal. Egg is the binder; and the fish cakes are formed and then put into the freezer for about 30 minutes so they hold together when you put them into the frying pan. It works! We loved them.
Enjoy.

Ingredients:
1-1/2 pounds of wild halibut, chopped into small pieces approximately 1/2 inch square
2 Tablespoons grated fresh ginger (Tip: Peel fresh ginger with a spoon)
2 finely diced Shallots
1 egg
1 teaspoon Kosher or Sea Salt
1/4 teaspoon freshly cracked black pepper

Preparation:
Chop and mix all the ingredients together except the egg. Then slightly beat up the egg and stir it into the fish mixture until everything is coated with egg and the mixture is . . .well, it's gooey.

Line a baking sheet with parchment paper.

Using an ice cream scoop, divide the mixture into 6 to 8 portions. Place each portion in a scoop or circle shape on the lined baking sheet. Put the baking sheet into the freezer for 20 - 40 minutes, until the fish cakes hold together.

Heat a non-stick frying pan coated with a teaspoon or so of coconut oil. Add the semi-frozen fish cakes to the pan and let them cook for at least 5 minutes, until they are brown on one side and will hold together when you carefully flip them over to let them fry until they are done, approximately another 3 to 5 minutes.

I didn't try this when I made the test recipe, but when I make the next batch, I may try to make a double recipe, freeze the second half until it is safe to put them into a freezer bag or container, and save them for use another time.


Wednesday, August 25, 2010

Fried herring

6-10 fresh herrings, heads removed, gutted and cleaned
2 tbs flour
2 tsp salt
½ tsp ground white pepper
100 g butter or margarine

If the herrings are large, butterfly them, otherwise leave them whole. Heat a frying pan with the butter. Mix together flour, salt and pepper and dredge the herring in the mixture. Fry the herring in the pan until golden brown. Serve with cooked potatoes and white sauce with vegetables

This recipe also works with mackerel.

From 160 fiskréttir by Helga Sigurðardóttir

Wednesday, August 18, 2010

MEDITERRANEAN ZUCCHINI BOATS


This time of year always means lots and lots of tasty, home grown vegetables, and many of us have an abundance of zucchini that we may not know quite what to do with. This recipe is a side dish that I saw in a Whole Foods while I was working on GOOD FOOD in 2009, and I simply had to include it in the book. The finished product is delicious hot or cold. It probably won't last long enough for you to taste it cold.
Enjoy.

Ingredients:
2 zucchini, approximately 8 – 10 inches long
2/3 – 3/4 cups grape tomatoes, lightly diced
1/3 to 1/2 cups Greek Feta cheese
1/4 cup pitted black olives, lightly diced
1/4 cup pepita seeds or raw pine nuts (optional)
1/4 cup chopped fresh Italian flat leaf parsley
A drizzle of olive oil (optional)

Preparation:
Preheat oven to 325 degrees.
1) Cut the zucchini in half, lengthwise,
and scrape out the seeds with a
teaspoon, forming a “ditch” for the other ingredients.
2) Cut a slim length of the skin on the bottom of the zucchini, so it will sit steadily on the plate.
3) Combine all the other ingredients and distribute them evenly into the four zucchini halves.
4) Bake until zucchini is just cooked, approximately 15 to 20 minutes.
5) You may want to drizzle a tiny bit of olive oil over the finished product.

Herring rolls

“All the housewives in the country should be on the habit of acquiring at least one barrel of salted herring for the winter. The barrel must be stored in a cold place, for if the herring goes rancid it will not make good food. It is our duty, Icelandic housewives, to ensure that more is eaten of the herring than is now the case, this wholesome, fine food, which is caught in such abundance off our shores.”
Foreword to the chapter on herring dishes in 160 fiskréttir (160 fish dishes) by Helga Sigurðardóttir.

Helga Sigurðardóttir was Iceland’s version of Mrs. Beeton. She was not only a cook book author whose books can be found in many Icelandic homes, but also a cooking teacher . Several of the recipes on this blog originally came from one or another of her cookbooks, whether altered or unchanged. In the following weeks I will be posting a selection of dishes from this book, beginning with that gem of a fish, the herring.


2 salted herrings
2 bunches fresh dill, chopped
200 ml white vinegar
150 ml water
2 ½ tbs sugar
1/3 tsp pepper (in old Icelandic cookbooks ‘pepper’ usually means ground white pepper, as I am sure it does here)

Clean the herrings, fillet them and remove skin and bones. De-salt in cold water for 18 hours. Remove and pat dry. Sprinkle the dill over the fillets, roll them up tightly and tie off with cotton string. Put into a jar. Mix together the vinegar, water, sugar and pepper and pour over the herring rolls. Close the jar and let the herring marinate in a cool place for several hours. Cut the rolls into slices and serve, e.g. as canapés.

Sunday, August 15, 2010

ROASTED CAULIFLOWER WITH GARLIC AND CAPER SAUCE

I was reminded of this recipe, originally created for GOOD FOOD, by Courtney from Nashville. Thanks, Courtney!
Everyone else - Enjoy.

Ingredients:
1 head (about 2 pounds) cauliflower, cut into small florets
1 tablespoon extra virgin olive oil
Kosher or sea salt and ground pepper
1 tablespoon organic butter
1 teaspoon extra virgin olive oil
2 cloves garlic, thinly sliced
1 tablespoon capers (more if you want - I often use half a small jar of capers including the juice)
1 tablespoon caper juice

Preparation:
1) Trim, and cut cauliflower into small florets.
2) Spread in a roasting pan or rimmed baking sheet.
3) Drizzle with olive oil; season with coarse salt and ground pepper. Toss to combine.
4) Roast, tossing once or twice, until cauliflower is golden brown and tender, 20 to 25 minutes, in a hot oven ( 375 - 400 degrees)
5) In a small skillet, melt butter and olive oil over medium to low heat.
6) Gently saute garlic cloves, 2 to 3 minutes.
7) Remove from heat. Add capers and caper juice.
8) Pour over roasted cauliflower, and toss to coat.

Wednesday, August 11, 2010

Blackcurrant jam - Sólberjasulta

Blackcurrants have come to be regarded as a superfood. They are very high in vitamin C, as well as being a good source of potassium, iron and pantothenic acid (vitamin B5). They are also very tasty.

When I was growing up, my grandmother's house was surrounded by a hedge of blackcurrant bushes. I loved being able to go out into the garden and pick the ripe berries off the branches and pop them straight into my mouth.

1 kg blackcurrants
100-200 ml water
500-600 g sugar

Rinse the berries under cold running water and drain well. Put in a cooking pot and bring to the boil. Cook for about 5 minutes, or until the berries burst, stirring occasionally. Remove from the heat and stir in the sugar until melted.

Pour into sterilised jars, filling them completely and closing them while the jam is hot. Should keep for a year, but if you want to make sure, add a preservative.

Wednesday, August 4, 2010

Redcurrant jam - Rifsberjasulta

I love redcurrants, both cooked and raw. I usually make redcurrant jelly, rather than jam, but the jam is good too, especially with smoked ham.

I sometimes make jelly from a mixture of redcurrants and stone bramble berries, which has a beautiful ruby-red colour and tastes delicious with strong cheese, and on the side with lamb and all sorts of game.

1 kg redcurrants
500-600 g sugar

Rinse the berries under cold running water and drain well. Put in a cooking pot and bring to the boil. Cook for about 5 minutes, or until the berries burst, stirring occasionally. Remove from the heat and stir in the sugar until melted.

Pour into sterilised jars, filling them completely and closing them while the jam is hot. Should keep for a year.

To make redcurrant jam with a preservative, use

1 kg redcurrants
350 g sugar
1/2 tsp salicylic acid (or other preservative)

Make the jam as instructed above, them mix in the preservative before putting the jam in the jars.

Saturday, July 24, 2010

Summer Grilling Favorite Recipe LEMON CHILI CHICKEN


Wanted to re-post this family grilling favorite, in the hope that it will help you stay away from commercial bar-b-que sauces. These sauces are loaded with sugar - they can turn a perfectly healthy dinner into an over-the-top sugar fest! I really hope that once you try this recipe, you will use it year round - on the outdoor grill or on a ceramic-coated grill pan inside. (See GOOD FOOD for more notes about ceramic coated cookware.) You'll never be tempted by those nasty, sugar-laden bottled sauces again.
Enjoy.

Lemon Chili Chicken

Ingredients:

1/3 cup lemon juice
2 tablespoons olive oil
1 tablespoon chili powder
3 cloves garlic, minced
2 tablespoons mustard
1/2 teaspoon salt
1/8 teaspoon white pepper
4 organic, antibiotic free, free range, boneless, skinless chicken breasts

Preparation:
1) Combine all ingredients except chicken.
2) Pour 80% to 85% of the marinade into a heavy duty zip-lock bag. (Reserve the remainder of the marinade for basting the chicken during grilling.)
3) Add chicken; close bag and zip to seal. Place in bowl or baking dish and refrigerate for 2-6 hours.
4) When ready to cook, discard the marinade left in the zip-lock bag. Prepare and preheat grill. Cook chicken for 12-18 minutes, turning once and brushing frequently with reserved marinade, until chicken is thoroughly cooked.

Smoked salmon sandwich spread

300 g smoked salmon
3 eggs, hard-boiled
2 tbs mayonnaise
4 tbs sour cream
Dill
Aromat or Accent (may be left out)

Chop the salmon very finely, e.g. in a food processor, but do not process into a paste – there should be tiny pieces of salmon in the spread. Mash the eggs with a fork and mix together the eggs, salmon, mayonnaise and sour cream. Add a little Aromat and dill. Chill and serve with crackers or slices of white baguette.

Saturday, July 17, 2010

Brauðterta – Icelandic style sandwich loaf: Tuna & egg

3 layers of bread (refer to the first sandwich loaf post for more information)

200 g mayonnaise
100 g sour cream
5 hard-boiled eggs
200 g canned tuna
1 medium onion
Aromat or Accent (may be left out or replaced with garlic powder)

Mix together mayo, cream and Aromat. Mash the eggs with a fork and drain the tuna well. Chop the onion very finely. Mix everything together and layer between the bread slices. Also put some spread on the ends and sides of the loaf and decorate with tuna, egg slices, and salad leaves.

Saturday, July 10, 2010

Brauðterta – Icelandic style sandwich loaf: Ham and egg

Decoration: Ham, canned peaches, tomato rose and cucumber strips.
For 3 layers of bread (refer to the first sandwich loaf post for more information)

150 g mayonnaise
100 g sour cream
Aromat or Accent, to taste (may be left out)
Piquant seasoning
150 g thinly sliced ham
5 hard-boiled eggs
1/2 can green asparagus

Mix together mayo, cream and seasonings. Mash the eggs with a fork and chop the asparagus finely. Mix everything together. Put the spread between the layers of bread, spread mayo-sour cream evenly mixture over the loaf and cover with slices of ham. Garnish with, e.g. tomato roses, egg slices, cucumber, bell peppers, halved or quartered grapes, fresh parsley.


More decoration ideas:

Decoration: ham and red bell pepper.


A roll. Decoration: ham, red and green bell peppers.

A giant sandwich. Decoration: ham, canned peaches, red bell pepper strips, orange slices, asparagus and parsley.

Saturday, July 3, 2010

Brauðterta – Icelandic style sandwich loaf: Shrimp

A double-wide. Decorations: Shrimp, cherry tomatoes, cucumber, parsley, eggs.
Continuing from last'week's post:

4 layers of sandwich bread
300 g mayonnaise
200 g sour cream
300 g Arctic shrimp
1/2 red bell pepper
6 hard-boiled eggs
Aromat or Accent (may be left out or you can substitute garlic powder)
I also like to use a teensy amount of freshly ground black pepper in shrimp fillings


A giant. Decorations: Shrimp, orange and lime slices, cucumber and a forest of parsley.
Mix the mayonnaise and sour cream until smooth and well-blended. Thaw and drain the shrimps well. Finely chop the pepper, mash the eggs with a fork and mix everything together. Put the spread between the layers of bread. Smooth a thin layer of mayo-sour cream mixture evenly over the loaf and garnish with large shrimps, egg slices and vegetables, e.g. bell peppers, cucumbers, tomatoes.

Tuesday, June 29, 2010

Lemon Asparagus Soup

Here is a delicious, healthy, and (if you hurry) local ingredient recipe that I found on Jamie Oliver's Food Revolution Facebook page. If you don't have one or two of the herbs in your herb garden or spice cupboard, I would suggest substituting your own favourites. If you don't have home made chicken broth, organic is strongly recommended.
Enjoy.


Ingredients:

2 cups asparagus
1 cup onion
2 cups (preferably home made) chicken broth
1 Tbsp organic butter (Extra Virgin Olive Oil may be substituted)
1 tsp lemon juice
2 Tbsp parsley, chopped
1 Tbsp lemon balm, chopped
1/2 Tbsp dried tarragon
Sea salt & pepper to taste


Preparation:

Wash a bundle of asparagus well to get all the sand out of the heads. (Soak in cold water and let the sand fall to the bottom) Break off the woody ends and chop the heads and stems until you have about 2 cups. Peel and chop a sweet onion.In a medium size pot, melt the butter and gently sauté the onion until it is translucent. Add the chopped asparagus and continue sautéing until the asparagus has turned bright green. Add the chicken broth, parsley, lemon balm, lemon juice, and tarragon. Cover the pot with a lid and let simmer until the asparagus in tender (about 10 minutes).Transfer the soup to a blender and liquefy. Note: This can be a dangerous procedure if you are not careful. Let the soup cool slightly, blend in small batches if necessary, and be sure to cover the lid of the blender with a towel to protect yourself in case of "eruptions."
Return the soup to the pot and keep warm.

Saturday, June 26, 2010

Brauðterta – Icelandic style sandwich loaf: Salmon and egg

I had planned to post a sandwich loaf recipe much earlier, but since I rarely make them and when I do I don’t use a recipe, I had to find a set recipe first. I finally did find it, in fact several of them, which I will be posting in the following weeks.

Sandwich loaves, or ‘bread cakes’ as they are called in Iceland, are an enduring presence at Icelandic celebrations where cakes are served. While not an Icelandic invention (I think they may have originated in the USA), they have been popular here for at least 50 years and there seems to be no stopping them. While the fillings change according to fashion and whim and we don’t use half as much mayonnaise in them as once was the case they continue to be a vehicle for cooks to display their talents with garnish, and a savoury palate cleanser in between nibbles of all the sweet cakes usually served at traditional birthday parties.

They are generally made from white bread, and you can buy the bread pre-cut for the purpose.

There are two kinds of sandwich cake bread available. One is basically a pan-baked loaf of white sandwich bread that has been sliced lengthwise, like this (for a bit of a laugh at the expense of yesterday’s cookbook authors, keep clicking the “next” button until you get to the end of the pictures).

The crusts are removed, leaving between 4 and 6 long slices of bread.

The other kind are rolls. These are big, thin slices of bread that look like the cake layer of a jelly roll before it's rolled up. They can either be rolled up or layered to make large sandwich cakes. In a pinch, the other kind can be used instead, but care is then needed when rolling them up.

These cakes can be made using any sandwich filling or anything you will find as a topping for Danish smörrebröd, but certain fillings are more common than others.

The most common are:
Ham and asparagus
Ham and egg
Shrimp salad (shrimp, egg, ham or shrimp, ham and pineapple)
Roast beef (roast beef with French-fried onions, remoulade sauce, and either sliced pickled cucumber or slices of canned peaches or apricots)
Tuna spread (tuna and egg and sometimes either chopped onion or sweet corn)
Salmon and egg

Traditionally, the fillings are held together with mayonnaise, and here arises a problem: Commercially made Icelandic mayonnaise is like no-other kind I have tried. It is not only thicker, but it is not as vinegary-tasting. I have on several occasions tried to make these kinds of fillings (in small portions suitable for sandwiches) with imported mayonnaise, but the only time it has worked out was when making tuna spread, and then only because I not only drained the tuna thoroughly, but I actually squeezed out all the juice before making the spread. Still, the flavour wasn’t as good. When I tried making shrimp salad with Hellman’s mayonnaise, the mayonnaise turned soupy and ruined the salad.

These days, a mixture of mayonnaise and sour cream is generally used, and sometimes the mayonnaise is dispersed with and cream cheese is used instead.

I never, ever use a recipe myself, but when you have never made one of these before a recipe is a good starting point. I rarely get the opportunity to make sandwich loaves, but I plan to take photos whenever I get the chance and will add them to show how these creations can be decorated. This and the other sandwich loaf posts are therefore going to become rerun posts, so if you leave comments, I will append your comments to the bottom of the appropriate post whenever I refresh it and bring it back to the top because Blogger erases the comments when you repost a blog entry with a new date.

And now for today's featured sandwich loaf:

Salmon & egg sandwich loaf
This is a delicious variation on the traditional salmon and egg salad loaf. A traditional loaf includes mashed hard-boiled eggs, but this uses scrambled eggs instead.

3 layers of sandwich bread

Salmon spread:
300 g smoked salmon, thinly sliced
5 eggs, hard-boiled
200 g mayonnaise
100 g sour cream

Keep back some extra slices of salmon

Chop the salmon and eggs into small pieces and mix well with the mayo and cream. Chill.

Scrambled eggs with salmon:
4 eggs
3 tbs cream
100 g smoked salmon
Salt and pepper to taste

Lightly whip together the eggs and cream and season with salt and pepper. Purée the salmon in a food processor and add to the egg mixture, stirring lightly together. Fry the scrambled eggs until well done and set aside to cool.

Put 1/3 of the salmon spread on the bottom layer of bread, top with the second bread layer, then the scrambled egg, then more bread and end with salmon spread. Smooth the remaining salmon spread on the ends and side of the loaf. Decorate with thin slices of salmon (or cover the whole thing with salmon slices) and garnish with vegetables, e.g. tomato roses, slivers of red bell pepper or cucumber. Egg slices are also suitable decoration.

Wednesday, June 23, 2010

PESTICIDE CLEANING OF FRUITS AND VEGETABLES

There are lots of local fruits and vegetables coming to your market these days. Unfortunately, local doesn't mean organic, and many of these lovely local delights may still have been sprayed with pesticides. Once a pesticide has been sprayed on a fruit or vegetable, it penetrates the skin of the food and begins to make its way into the flesh; but a good pesticide wash is, at least, a start. Organic is still best.
Grapefruit Seed Extract can be found in health food stores.
Enjoy.

Instructions
Things You'll Need:
· spray bottle
· funnel
· small bowl
· 1 cup water
· 1 cup white vinegar
· 2 tbsp baking soda
· 20 drops grapefruit seed extract
1. In small bowl combine 1 cup water, vinegar, baking soda and grapefruit seed extract. Stir.
2. Place a funnel in the mouth of the spray bottle and gradually pour liquid into the bottle.
3. After closing container; spray concoction on fruits and vegetables. Let it sit for an hour or two. Rinse.

Saturday, June 19, 2010

Skyr dessert

200 g oatmeal biscuits/crackers (e.g. Graham crackers)
60 g butter
1 tbs sugar

Crumble the crackers finely. Melt the butter and stir into the crumbs with the sugar. Press into the bottoms of several small serving bowls.

4 sheets gelatin
The juice of 1/2 lemon
300 g plain skyr
100 g sugar
2 eggs
150 g sour cream
1 tbs sugar

Soak the gelatin sheets in cold water for 5 minutes. Remove from the water, squeeze out the remaining water and put the gelatin in a bowl or the top of a double boiler with the lemon juice. Heat gently until the gelatin is melted.

Separate the egg yolks from the whites. Mix together sugar and skyr and add the egg yolks, one by one. Fold in the sour cream.

Lightly whip the egg whites with 1 tbs. sugar. Mix the gelatin into the skyr mixture and then gently fold in the whipped egg whites. Divide the mixture between the bowls and cool in the refrigerator.

This can also be made into a whole dessert, in which case use a large, deep pie dish.

Friday, June 11, 2010

Liver with bacon (Lifur með fleski)

I love liver with bacon. I haven't tried this recipe, but I plan to.

750 g liver
100 bacon
1 tsp salt
1/3 tsp pepper
1/6 tsp ginger
1/6 tsp ground cloves
60 g cooking fat
400 ml boiling cooking liquid
150 ml cream
40 g flour
200 ml cold water

Clean the liver and cut into thin slices. Mix together the flour, salt and spices and roll the liver slices in it to coat. Lay a rasher of bacon on each liver slice and roll up the slices. Tie together with cotton string. Heat the cooking fat ion a pan and brown the liver slices in it. Add the milk and water and cook for 15-20 minutes. Thicken the sauce with the flour (make a paste with a little cold water to avoid clumping). Cook the sauce for a couple of minutes, then add the cream.

I imagine this would be nice with mashed potatoes, redcurrant jelly and a salad.

Wednesday, June 9, 2010

GRILLED STEAK WITH CHIMICHURRI SAUCE

Outdoor grilling season makes me so happy. The addition of the chimichurri sauce is really fun, especially if you are growing flat leaf parsley. The sauce should keep in the refrigerator for a few days, but it probably won't last that long.
Enjoy.

Ingredients:
¾ cup finely chopped fresh Italian (flat leaf) parsley
½ cup olive oil
3 tablespoons fresh lemon juice
2 ½ tablespoons finely chopped garlic
2 ½ teaspoons dried crushed red pepper (see note)

2 grass‐fed beef steaks, your favorite cut, 4 to 6 ounces each (about 1 inch thick)

Note: Use any kind of dried hot spice you like for the crushed red pepper. For instance, I am a fan of ground chipotle pepper. Also, when it comes to adding spices, start slowly, taste, and then decide if you want to add more.

Preparation:
1) Place all ingredients except the beef in a food processor. Pulse until a smooth sauce is achieved.
2) Refrigerate if time permits. (Can be made 1 day ahead.) Bring to room temperature before using.
3) Sprinkle both sides of steaks with sea salt and pepper.
4) Place steaks on barbeque grill and cook until desired doneness, about 3 minutes per side for medium‐rare.
See our notes about cookware here, or in GOOD FOOD if you are cooking on an indoor grill pan.
5) Once the steaks are cooked, let them rest off the heat for at least 5 minutes before slicing and serving them. Slice steaks crosswise (across the grain of the meat) and arrange on a platter. Spoon chimichurri sauce over the steaks and serve.

Monday, June 7, 2010

Restaurant Quality Caesar Salad, Complete with Croutons and Dressing

My Romaine Lettuce was fully grown and ready to harvest. I had raw Parmesan cheese from the organic market. Nothing left but to develop a Caesar Salad worthy of my high quality ingredients. Thank goodness for a quiet, rainy Sunday when there’s recipe development to be done.

If you are on the Core Plan, your crouton options include whole grain bread. Just toast it and rub it with fresh cut garlic, then slice it into cubes. If you are on the Advanced Plan, you do not have the bread option, but the crouton substitutions are easy. One option is to use whole raw walnuts or pecans for croutons. We used Parmesan Tuiles (a kind of cookie) broken into pieces once cooled. There are many ways to make the tuiles, but the method below allows make-ahead preparation.

The salad is so delicious, the crouton question will not be an issue. The recipe will serve 4, so make a party of it.
Enjoy.

Parmesan Tuiles

Ingredients:
1 cup freshly grated raw or imported Italian Parmesan Cheese. For best results, grate with a micro-plane or other grater that produces a fine grate.
Yield: 4 to 5 tuiles
(If you have lots of raw Parmesan on hand, you may want to double this amount.)

Preparation:
Preheat the oven to 350ºF. Line a baking sheet with parchment paper. For each tuile, spread 3 tablespoons of the grated cheese on the paper to form a 3-inch round.

Bake until golden brown, about 12 minutes. Cool for 1 minute.

Using a metal spatula, transfer the tuiles to another piece of parchment paper and cool completely. Use immediately or store in an airtight container for up to 24 hours. For the Caesar Salad “croutons,” break cooled tuiles into bit sized pieces.

Caesar Salad Dressing

Ingredients:
1/2 cup extra virgin olive oil
4 cloves fresh garlic, peeled, then smashed and minced, or grated with a micro-plane
1/4 cup freshly squeezed lemon juice (plus more to taste if desired)
4 ounces raw or Imported Italian Parmesan cheese, grated
1 teaspoon anchovy paste, or 1-2 anchovies, smashed and minced
2 egg yolks
freshly ground black pepper (1/4 teaspoon or to taste)
1/2 teaspoon salt (optional)
Note: Anchovy Paste is widely available in grocery stores and specialty markets. Be sure to check the label, though, because some anchovy paste products contain canola oil. You don't want that.

Preparation:
In the salad bowl, whisk together the olive oil and garlic. Let this mixture stand for half an hour to infuse the olive oil with the garlic flavor.
Add anchovies and egg yolks to the oil and garlic mixture. Whisk until creamy. Add salt and pepper and 1/4 cup of lemon juice. Whisk in half of the Parmesan cheese. Taste, add more lemon juice to taste. The lemon should give an edge to the dressing, but not overwhelm it.
Add torn Romaine Lettuce (approximately 1 or 2 large, or 3 small heads) and toss to coat the lettuce leaves with the dressing. Add the Parmesan Tuile “croutons” and the remainder of the Parmesan Cheese, and toss to serve.

Friday, June 4, 2010

Stuffed sheep's hearts - Fyllt hjörtu

5-6 sheep's hearts (or 4-5 pig's hearts)
10-12 prunes (stoneless)
600-700 ml mixture of equal proportions water and milk
50 g butter
50 g flour
salt and pepper
sauce colouring

Chop up the prunes and stuff the hearts with them. Sew closed. Melt the butter in a pan and brown the hearts in it. Sprinkle with salt and pepper, add the milk/water mixture and cook for 1-2 hours. Remove the hearts from the cooking liquid.

Make a paste of the flour and a little bit of cold water. Bring the cooking liquid to the boil and stir in the flour paste to make a sauce. Add sauce colouring if desired.

Cut the hearts into slices, and serve with the sauce on the side.

Monday, May 31, 2010

Advanced Plan Pizza- What?!?


What?!?

I know. When I found this recipe (at a website called "Tropical Traditions"), I was extremely skeptical. The second time I tested the recipe, I made two batches, because I knew we would snack the first one away (as we did the original test) before a whole pizza could be made. Honestly, we love this recipe as a kind of a cheese bread and as a pizza crust.
Enjoy.

Ingredients:
2 cups whole milk organic (raw is preferable) mozzarella cheese, shredded
2 large organic eggs
2 tablespoons flax meal
2 tablespoons organic coconut flour
1/2 teaspoon aluminum free baking powder

Preparation:
Preheat oven to 350 degrees F. Cut 2 pieces of parchment paper to line two baking sheets.

Mix cheese, eggs, flax meal, coconut flour, and baking powder together until a sticky wet dough is formed. Spread with a spatula to 1/4 inch thickness on a baking sheet lined with one piece of parchment paper. I usually cover it with another piece of parchment, once I have it shaped into a circle, and roll it out with a rolling pin a bit more, because it will "rise" a little while cooking, and I want it to cover as much surface area as possible, and remain thin like a pizza crust.

Bake for 30 minutes in preheated oven. Halfway through the baking process, flip crust over by lifting it from the baking sheet, flipping it over onto the second parchment lined baking sheet and peeling the old paper off. This is easier than it sounds. Return to oven to finish baking for the remaining 15 minutes.


Remove from oven, and flip over again (onto a cooling rack) for cooling. Once crust is cooled, top with Maximized toppings (we used some cold diced organic chicken and tiny broccoli florets) and, yes, more cheese. (I have also used home made bruschetta topped with the cheese, and it was wonderful.)

Place crust with toppings under the broiler, about 4 to 6 inches from heating element, on high heat, for a minute or two until cheese is melted and bubbly. I do this on yet another piece of parchment paper, but watch it carefully because the broiler will burn the parchment paper if you leave it too long. My parchment paper has been brown, but not burnt, by the time I remove the pizza from under the broiler.


Makes 2-4 servings. (I suggest you make two.)

Thursday, May 27, 2010

Organic Strawberries, Maximized Shortcake

This morning I whipped up a batch of the Basic Almond Muffin recipe in GOOD FOOD. I added some lemon zest and substituted lemon juice for the water called for in the recipe. I like to mix things up and experiment, and these two changes turned out to be a good idea, although the original recipe is lovely just the way it is. (By the way, if you are an inexperienced baker, remember that baking is chemistry. You can't change amounts of ingredients or skip ingredients the way you can in cooking, which in many ways is a more creative venture.)

Anyway, later in the day I ran across some organic strawberries.

You know the rest. Whip up some organic cream, gently sweetened with a tiny bit of stevia and a whisper of vanilla extract. Slice a muffin in half, add berries and whipped cream and top with mint fresh from my garden. (The only reason I planted mint this year was to decorate desserts.) We couldn't wait for our meal to be over: Dessert Heaven.

Enjoy.

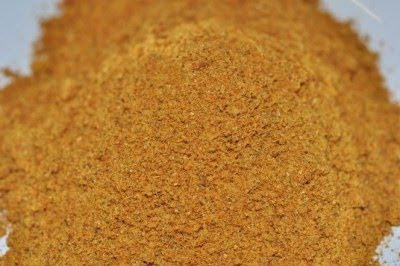
Middle Eastern Spice Mix Recipe


How to make a Middle Eastern Spice Mix

There are many different spice blends in the Middle East varying from country to region.

This Middle Eastern spice mix recipe has been specially blended by Chef Jeena.

As with Indian spices, Middle Eastern spice blends have a variation of some select spices such as cumin, coriander, turmeric, sumac, mint, thyme, nutmeg, pomegranate, cinnamon and many more.

Middle Eastern cuisine uses garlic, olive oil and lemons just as the Mediterranean.

This delicious and aromatic spice blend is very easy to make, there is no roasting of the spices.

Chefs Middle Eastern spice blend recipe can be used to sprinkle on food, marinate meats and more.


Spice ingredients


1 + 1/2 tsp Cumin
1 tsp Coriander
1/2 tsp Sumac
1/4 tsp Dried mint
1/2 tsp Dried thyme
1/4 tsp Dried pomegranate seeds
1/2 tsp Cinnamon
1/4 tsp Nutmeg
2 tsp Paprika
1 tsp Salt
1 tsp Light brown sugar
1/2 tsp Turmeric
Pinch black pepper


Picture of Chefs spice blend mixed with lemon, olive oil and garlic.


How to make Middle Eastern spice mix/blend


Take all of the spices listed on the ingredients and place into a coffee grinder or spice grinder.

Pulse for 1-2 minutes until the pommegranate seeds become powder.


Keep in a sealed container until used.


For a delicious marinade mix Chefs Middle Eastern spice mix with olive oil, garlic paste and fresh lemon juice.


Friday, May 21, 2010

Liver pate - Lifrarkæfa

I love liver pate, but I have never tried to make it, probably because you can get perfectly good liver pate in most supermarkets in Iceland. This sounds like a good recipe:

700 g liver
300 ml milk
2 cooked potatoes
1 tbs chopped, browned onion
3 eggs
100 g butter or 300 g fatty bacon
7 tbs flour
salt and pepper
dash of cardamom
1 fillet of spice-pickled herring (or about 10 anchovy fillets)

Soak the liver in cold water for about 30 minutes. Remove the membranes and blood vessels. Chop coarsely and put through a grinder 4 times, with the herring/anchovies, onion, and bacon (if using). Add the potatoes for the last round of grinding.

If you're using a food processor, dump everything above in at once and process into a smooth paste, using the chopping blades.

Mix together the flour and spices and mix into the liver paste along with the cooled melted butter (if using). Add the eggs and mix well. Finally stir in the milk, little by little.

Grease a pate mould and press the raw pate into it. Cover with a cheesecloth and cook in a water-bath(*) for about 1 hour.

May be served hot or cold. A classic delicious Danish smørrebrødrecipe calls for dark rye bread with warm liver pate, bacon and mushrooms.

I like liver pate best smeared on Danish rye bread and topped with pickled red beets. The first time I brought such a sandwich with me to school for my mid-morning snack, the other kids thought the sandwich filling was raw meat!
-----------

(*) Water-bath: Heat an oven to medium temperature (about 180°C). Bring to the boil enough water to cover the bottom of an oven-proof pan (e.g. a jelly roll pan). Put the pate mould into the pan, pour the boiling water into the pan and put immediately in the oven to cook.

Saturday, May 15, 2010

Coconut Flour Crepes


These crepes are surprisingly delicious. They can be used for breakfast or brunch, and would be the beginning of a lovely dessert. To that end, I would suggest rolling fresh, local, blueberries, raspberries, or strawberries into the crepes, and topping them with a dollop of organic, stevia sweetened, cinnamon whipped cream. If you are using them for breakfast, I would top them with the Strawberry Sauce recipe which you can find in GOOD FOOD.

I also did a chocolate version of this recipe. I simply added 2 tablespoons of organic unsweetened cocoa powder, and substituted unsweetened chocolate almond milk for the milk in the original recipe. I also had to bump up the stevia to counter the bitterness of the cocoa powder. (Frankly, I preferred the original recipe, but I know there are lots of chocolate lovers out there.)

I tested the crepes in two types of pan. I used an old, very well seasoned, cast-iron pan, and I used a new Earth Chef pan that I recommended in GOOD FOOD. Both worked beautifully.

Enjoy.


Ingredients:
2 eggs
2 tablespoons coconut oil, melted
Stevia liquid drops, to taste (I use about 10 drops)
1/4 teaspoon pure vanilla extract - NO sugar, check the label (can substitute almond extract)
1/8 teaspoon salt
2 tablespoons organic coconut flour, sifted
small pinch of nutmeg
pinch of cinnamon
1/3 cup organic whole milk or unsweetened vanilla almond milk


Preparation:
In a medium bowl with a wire whisk, beat together the eggs, oil, stevia, vanilla, and salt. Mix in sifted coconut flour, nutmeg and cinnamon; stir in milk.
Heat an 8-inch skillet over medium heat. When hot, melt a tiny bit of coconut oil in the pan.

Pour 1/8 cup (two tablespoons-full) of batter in the skillet and swirl around in pan until a thin layer of batter covers the bottom. The crepe should be about 6-inches in diameter. (If you don't want them paper thin, govern your swirling accordingly.)

Cook 1-2 minutes, or until batter is bubbly and cooked around the edges. Flip the crepe and cook the other side for 1-2 minutes more, or until done.

These should be kept in the refrigerator if you want to use them for a dessert later in the day, but I would separate them with layers of parchment paper, and remove them from the fridge about an hour before dinner.

Friday, May 14, 2010

Stuffed leg of lamb

This is a rather good Sunday dish. If you don't know how to de-bone a leg of lamb, either buy it de-boned or get your butcher to de-bone it for you.

1 leg of lamb (about 2 kg. before boning)
50 g prunes, stoneless
30 g dried apples
2 tsp. salt
3/4 tsp. pepper

Soak the apple slices to soften. Rub half of the salt and pepper on the inside of the leg of lamb and stuff with the prunes and apple slices. Sew closed. Rub the remaining salt and pepper on the outside of the meat.

Put meat into a greased oven pan and roast at 250°C for about 90 minutes, or until a meat thermometer inserted into the steak shows 160°C. Start by roasting for 10-20 minutes, then add water to cover the bottom of the pan, to a depth of about 1 cm. Baste the meat with the cooking liquid every 15 minutes or so. Top up the water when it starts to boil down.

About 10-15 minutes before the steak is done, remove it from the oven, pour the cooking liquid into a saucepan, through a strainer. Put the steak back into the oven until a nice crust has formed. While it is in the oven, make the sauce:

Skim the fat off the surface of the cooking liquid. Heat in the saucepan. Make a thin, smooth paste from a couple of tbs. of flour and a bit of cold water. When the cooking liquid boils, stir the flour paste into the boiling liquid, stirring with a beater. Pour slowly and when you feel the liquid starting to thicken, stop pouring. Gently simmer the sauce for a couple of minutes, to remove the raw flour taste. Adjust the flavour with salt and pepper, and if you use it, add a little sauce colouring to get a nice, brown colour.

Serve either whole or sliced, with potatoes (poached, caramelised or mashed), sauce and whatever other side dishes you like (I like redcurrant jelly, salad and peas).

Tuesday, May 11, 2010

Maximized Lemon Pound Cake


Here's a dessert B.J. really liked. It is a pound cake, yes, but it is made with coconut flour rather than conventional or AP flour, so it is completely guilt free for people (like me) who are doing their best to remain true to the Advanced Nutrition Plan.
Enjoy.


Ingredients:
· 5 eggs
· Approximately ½ to 1 teaspoon liquid stevia (sweeten to your taste)
· 1/2 teaspoon pure vanilla extract
· 3/4 cup organic whole milk yogurt
· 2/3 cup freshly squeezed lemon juice
· zest of 1 lemon
· 1/2 cup (1 stick) organic butter, melted
· 2 teaspoons aluminum free baking powder
· 1/4 teaspoon kosher or sea salt
· 1 cup organic coconut flour, sifted (this is available at bulk food stores)

Preparation:
Preheat oven to 350 degrees F. Grease a 9x5-inch loaf pan with coconut oil, and flour with coconut flour. If using anything but a glass loaf pan, line the bottom of the pan with parchment paper. Grease the parchment with coconut oil, and flour using coconut flour.

In a large bowl beat the eggs with an electric mixer. If you have a KitchenAide stand mixer, all the better. Next add the stevia, vanilla, yogurt, lemon juice and zest. Mix until combined. Taste, and adjust sweetness by adding more stevia if you prefer. Add the melted butter in a constant stream, mixing continuously.
Sift together all of the dry ingredients. Using a spoon or spatula fold in the dry ingredients to the wet. The mixture will thicken up right before your eyes once you have added the coconut flour and other dry ingredients.

Bake for 45 to 55 minutes (I was closer to 55 minutes), until a toothpick inserted in the center of cake comes out clean. Let cake cool for 5 to 10 minutes in the pan. Invert on a cooling rack and let cool completely……if you can wait that long. On Mother's Day, we served this topped with stevia sweetened raspberry frozen yogurt. Not bad, eh?

Monday, May 10, 2010

Storing Fresh Herbs

Once the weather begins to brighten, planting herbs becomes a top priority for me. I have found in the past that herbs are not as fragile as annuals, so frost is much less of a concern (with the exception of basil, which really loves the hottest weather it can get). I am experimenting with some new herbs and vegetables this summer, all planted in containers (city mouse that I am), and all chosen because I know I will actually use them in my meals. I got some beautiful lettuce plants from McSmith’s farm a couple of weeks ago, and they are also doing beautifully.

Over the rainy Mother’s Day weekend, I happened upon the following advice about storing fresh herbs once they are picked, and decided to pass it along. This method will work whether you plant and harvest your own herbs, or you buy them in bunches at the market. Fresh parsley, cilantro, basil, and other fresh herbs can last up to 2 weeks or longer when stored this way.
Let me know how it works for you.
Enjoy.

METHOD:
1 Snip off the bottom of the stems.
2 Make sure the leaves are completely dry. Better to hold off rinsing them until you're about to use them.
3 Fill a jar or a water glass partially with water and place the stem ends of the herbs into the water in the jar. (See the photo above.)
4 If you are storing the herbs in the refrigerator, cover loosely with a plastic bag. Cilantro loves cool temperatures and should be stored in the refrigerator. Parsley can be stored at room temperature or in the refrigerator. According to experts, basil is ideally stored at room temperature and not in the refrigerator, because it is susceptible to damage from cold.
5 Change the water after several days if the water starts to discolor.

Saturday, May 1, 2010

Twice-baked buns - Tvíbökur

Twice-baked bread keeps well and is good in all kinds of sweetened soups, like Sweet Soup, Crowberry Soup, and Cocoa Soup.

250 g flour OR

100 g bread or all-purpose flour and 100 g whole-wheat flour

t tsp baking powder
1 tbs sugar
1/2 tsp ground cardamom
75 g butter or margarine
100-150 ml milk

Sift together the flour, baking powder and cardamom and add the sugar. Add the softened butter or margarine and rub into the dry mix until the mixture is crumbly. Add the milk, no more than needed to make the dough stick together. Knead until smooth and roll up into sausage shapes. Cut into even-sized pieces and roll into balls. Arrange on a greased cookie sheet and bake at 180°C until light brown.

Remove the buns from the oven and cool until they can be handled, then cut in half, put back on the cookie sheet and dry in the oven at a low temperature.

Serve with the above-mentioned sweet soups or with coffee.

Wednesday, April 28, 2010

Hollandiase Sauce 101


While the asparagus is still local and fresh, you will want to fancy it up now and again for Sunday dinners, or other special occasions. Nothing dresses asparagus like Hollandaise Sauce, and this recipe, which I found online at "Simply Recipes," is “Maximized,” delicious, and (perhaps more importantly) easy. What more can we ask? (I know it looks like the preparation is lengthy, but once you read through, you will see how simple it really is.) Prepare this sauce just before your meal.
Enjoy.

Ingredients:
3 egg yolks
1 tablespoon lemon juice
1/2 teaspoon salt
1/8 teaspoon cayenne (optional)
10 tablespoons butter
Preparation:
1) Melt the butter slowly in a small pot. Try not to let it boil – you want the moisture in the butter to remain there and not steam away. Once the butter melts, turn off the heat and let it cool just a little bit while you prepare the eggs.
2) Add the egg yolks, lemon juice, salt and cayenne (if using) into your blender. Blend the egg yolk mixture at a medium to medium high speed until it lightens in color, about 20-30 seconds. The friction generated by the blender blades will heat the yolks a little. The blending action will also introduce a little air into them, making your hollandaise a bit lighter.
3) Once the yolks have lightened in color, turn the blender down to its lowest setting (if you only have one speed on your blender it will still work), and drizzle in the melted butter slowly, while the blender is going. Continue to buzz for another couple seconds after the butter is all incorporated.
4) Turn off the blender and taste the sauce. It should be buttery, lemony and very lightly salty. If it is not salty or lemony enough, you can add a little lemon juice or salt to taste. If you want a thinner consistency, add a little warm water. If you do this, pulse briefly to incorporate the ingredients one more time.
Store until needed in a warm spot, like on or next to the stovetop. Use within an hour or so.
Makes about 1 cup of sauce, good for about 4-6 servings.

Tuesday, April 27, 2010

Sweetcorn Frittata Recipe (Omelette recipe)


How to make a sweetcorn frittata

What is the difference between a frittata and an omelet?

A frittata is an egg dish that is cooked in a pan or oven dish with a combination of other ingredients such as vegetables, pasta or potatoes and served whole and sliced. Omelette is an egg dish that is pan cooked then folded in half, usually with a filling in the middle.

No need to worry about being technical in the kitchen, it does not matter whether you call it an omelette or a fritatta, all you need to know is that this recipe tastes amazing!

Chef cooks a very delicious sweetcorn frittata recipe that is easy to cook and packed with flavor.

Frozen sweetcorn is fried with garlic and mushrooms then topped with a tasty egg mixture and grilled with cheese and paprika under the grill to finish.

Paprika plays an important part in this delicious frittata recipe so do be generous when sprinkling the paprika in this recipe.


The great thing about this frittata recipe is that once you have cooked the mushrooms and sweetcorn there is no stirring, the frittata sits and cooks whole in the pan.

If you are a novice in the kitchen and find that you're omelette's tend to stick a lot do not worry. If you have trouble removing the frittata from the pan simply and gently slice the frittata whilst it is still in the pan and serve as individual slices.


Chefs sweetcorn frittata recipe is extremely delicious and will leave you're family and friends wanting more.


Ingredients

3 medium Eggs
2-3 Handfuls Frozen Sweetcorn
2 large Handfuls of Mushrooms (sliced)
2-3 Garlic cloves (minced)
Rice bran oil
2 tsp Grated Parmesan cheese
Pinch Salt
Small piece Mature cheddar cheese (low fat works great)
Large pinch Paprika
Pinch Parmesan cheese
Fresh Parsley for garnish


How to make a sweetcorn frittata


Using a fork whisk the eggs, 2 tsp of Parmesan cheese and a tiny pinch of salt.

Leave to the side while you cook the mushrooms.


Warm a large frying pan on a medium heat and drizzle in a little oil.

Add the sliced mushrooms, stir and cook for a minute then add the minced garlic. Once the garlic is added stir well for a minute then immediately turn down the heat so that the garlic does not burn.

Cook for a few minutes on low stirring all the time.


Add the frozen sweetcorn and stir well.

Cook for a minute then turn the heat back up again briefly, keep stirring.

Turn to low and cover for 2 minutes.


Remove lid, cook and stir until the sweetcorn is hot(and the odd few corn kernels start to caramelize).


When you pour the egg mixture into the pan do not stir! Make sure the egg spreads across the whole pan by tilting the pan a little.

It is important that you do not stir at this point.

Leave the frittata to cook on a medium/low heat for a few minutes then turn the heat down.

Once the frittata eggs start to set use a small spatula to gently release the edges of the frittata, do not try to lift the middle of the frittata.

Do not try to turn the frittata over and do try to lift the entire frittata.


Let the frittata cook some more without moving it.

The more it cooks and the more 'set' the eggs become the more you can gently lift the frittata towards the middle. There is no need to life out of the pan yet, or turn over.


Do not try to remove the frittata from the pan until it is ready to serve.

When the frittata is 'almost' cooked it is ready to go under the grill.

The bottom of the frittata should be set and cooked and there should be some raw runny eggs roughly covering the top in a thin layer.

Turn the heat off and place the pan onto a cold cooking ring. Grate the cheese over the top of the frittata (go easy on the cheese you want just enough for flavor) then sprinkle a touch of Parmesan cheese.

The most important part here is to add a good generous pinch of paprika and sprinkle it on top, the paprika makes this dish very tasty.


Take the whole pan and place it under a grill for a few minutes being sure to keep checking on it so that it doesn't burn.

The grill will finish cooking the eggs and melt the cheese.


When the eggs and cheese are cooked and melted then the sweetcorn frittata is ready to serve.


Gently try to ease the frittata out of the pan using a large spatula and let the frittat slide from the pan onto a plate.


Tear some fresh parsley leaves and sprinkle over the top and serve warm.

Enjoy Chefs sweetcorn frittata recipe.